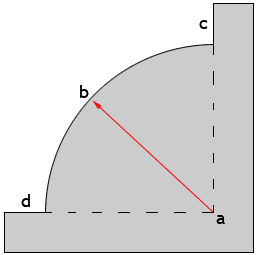

The ovolo is a classical stone moulding consisting of a quarter circle, radius a-b, bounded by two fillets c and d. The line formed by a-d being perpendicular to that formed by a-c.
Steps For Working An Ovolo Mould In Stone
- Applying the template to the stone
- Working the initial chamfer
- Working the fillets
- Working further chamfers
- Finishing the ovolo
Applying The Template To The Stone
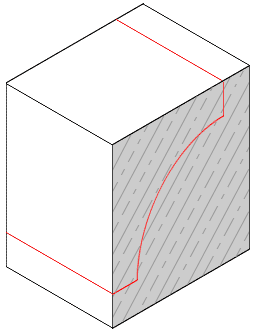
The process of working an ovolo mould begins by marking the template onto the parallel joints of the stone using a scriber. Templates for stone are traditionally made from zinc sheeting.
Working The Initial Chamfer
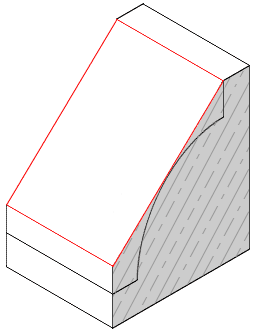
The next step is to scribe a large chamfer on the stone. Note from the picture that the chamfer is marked on such that it touches two of the outer edges of the mould to be worked. Working to two points of the mould like this maximises efficiency.
Working The Fillets
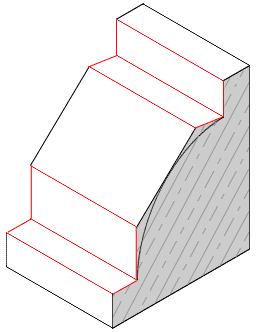
With the large chamfer finished, the two fillets are worked. As with all stages of working stone, the fillets are checked with a straight edge for trueness.
Working Further Chamfers
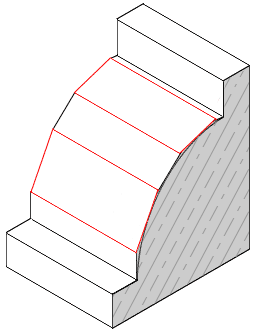
Once the fillets are worked the curve of the mould is defined further with smaller chamfers. The marking of the chamfers on the stone is done with a sliding bevel to ensure they are the same angle and parallel.
Finishing The Ovolo Mould
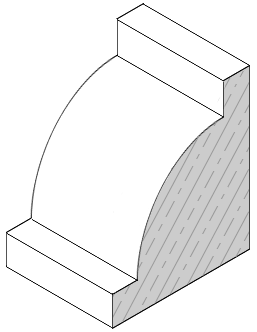
Following on from the previous stage, the curve of the mould is refined by working further chamfers on the stone with each being smaller than the last until a true curve is produced. The final stage is to tool the curve over to remove any flat spots with a bolster and dummy.
A PDF version of this page is available